10 Rainy Day Drawing Activities for Kids (Cozy Indoor Art Ideas)
Rain hammering the windows, kids bouncing off the walls, and the park is definitely not happening. Every parent knows this scene. But here’s what we’ve learned after years of watching kids draw: rainy days are secretly the best drawing days. No one’s rushing off to play outside, the light’s soft, and there’s something about grey weather that makes crayons look extra bright.
So instead of surviving the next downpour, lean into it. Here are ten rainy-day drawing activities we genuinely love — each one ties into a free step-by-step tutorial on DrawCub, so nobody stares at a blank page wondering where to start.
Draw the weather itself
1. Sketch what’s outside the window
Set up by the window, look out, and draw exactly what you see: the clouds, the rain streaks, the drips racing down the glass. Our tutorial on how to draw a rain cloud is the perfect starting point — kids can copy it, then add their own twist (a grumpy cloud? a cloud wearing sunglasses?). Drawing from real life is a skill, and a rainy window is the lowest-pressure model imaginable. It doesn’t move. It doesn’t complain.
2. Draw the rainbow that comes after
Every rainy afternoon ends the same way in a kid’s imagination: with a rainbow. Our rainbow tutorial walks through the arc, the colour order (a surprisingly good memory exercise), and the clouds at each end. Challenge idea: draw the rainbow first, then draw what you’d put at the end of it. Treasure chest? Ice cream shop? A second, smaller rainbow? The answers kids give are never boring.
Cozy kitchen art
3. Design your dream hot chocolate
Hot chocolate is basically a rainy-day food group, so let’s draw it. Our hot chocolate tutorial covers the mug, the steam swirls, and the all-important marshmallows. Then comes the fun part: redesign it. A mug shaped like a cat? Whipped cream the size of a mountain? Ten marshmallows? Kids take “design your dream version” very seriously, and the results are always worth the fridge.
4. Decorate cookies on paper
Real cookie decorating involves icing everywhere and at least one cookie eaten “for quality control.” Paper cookies have no such risks. Follow our cookie tutorial, then go wild with the decorations — draw the icing swirls, the sprinkles, the chocolate chips. We’ve seen kids spend forty minutes on one cookie. Forty minutes of quiet. You’re welcome.
After-the-rain nature
5. Grow a mushroom forest
Rain is mushroom weather, and our kawaii mushroom tutorial is made for this moment — those chubby little caps with the cute faces are irresistible. Draw a whole forest of them: big ones, tiny ones, one that’s clearly the boss of the forest. Add some grass, a ladybug if you’re feeling ambitious, and suddenly it’s a whole rainy woodland scene.
6. Draw a frog in a puddle
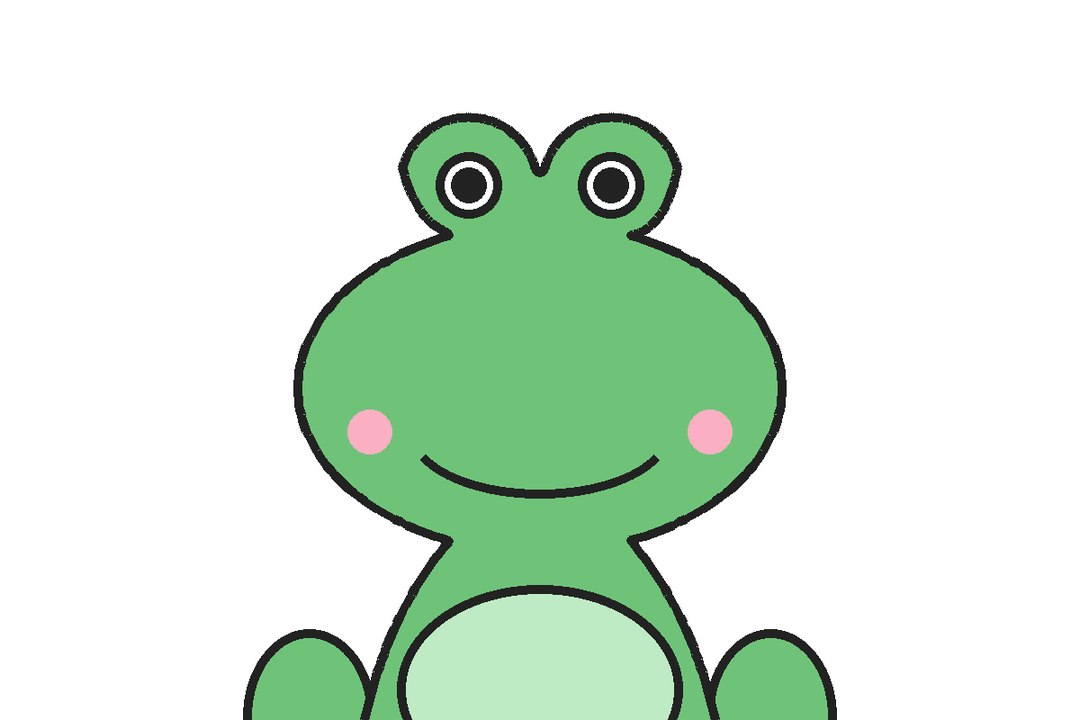
Frogs love rain. It’s their whole thing. Our frog tutorial gives you that wide grin and those bulgy eyes in a few simple steps — then have your kid draw the puddle around him, complete with raindrop ripples. Bonus points for drawing the frog mid-jump with little motion lines. This one always ends up funnier than planned.
7. Draw a duck braving the storm
Ducks don’t mind rain one bit — their feathers are waterproof, which is frankly unfair. Our duck tutorial is nice and forgiving (plump bodies hide wobbly lines beautifully). Draw the duck under a rain cloud, give the cloud a personality, and you’ve got a little story on the page. Is the duck happy? Annoyed? Singing? Kids will tell you. At length.
Warm-and-snug indoors
8. Draw the coziest fireplace ever
There’s nothing like drawing warmth when it’s cold outside. Our fireplace tutorial covers the bricks, the mantel, and those flickering flames — and then your kid gets to decorate the mantel however they like. Stockings in October? Sure, why not. A row of their own drawings in tiny frames? We love a meta moment. This is the drawing equivalent of a blanket.
9. Study candlelight
This one’s a little different — and a little magical. Light a real candle (grown-ups handle this part), turn the room lights low, and draw what you see. Our candle tutorial gives the shape; the real lesson is the glow. Kids can try drawing the halo of light around the flame with yellow crayon, pressing lightly. It teaches them to look at light, not just objects — and it’s genuinely calming. Ten minutes of candle-drawing can reset a whole cranky afternoon.
10. Draw your houseplants as portraits
Stuck inside? The plants are stuck inside too. Solidarity. Our potted plant tutorial is the base — then treat each plant like a portrait subject. Give it a name. Draw it from the side it looks best from. Add a little speech bubble if it seems like the chatty type. Kids who do this start noticing their plants for real, and honestly, so do the adults.
How to set up a rainy-day drawing corner
You don’t need much — but a tiny bit of setup turns “go draw something” into an event kids actually want.
- Claim one spot. The kitchen table, a corner of the living room, anywhere with decent light. Same spot every rainy day. Rituals matter to kids.
- Put out more than they need. Crayons, markers, coloured pencils, a few sheets of paper — abundance invites experimenting. One pencil and one sheet says “test.” A spread says “play.”
- Draw alongside them. You don’t have to be good. (We say this with love: you really don’t.) A parent sketching badly next to a kid is worth more than any tutorial — it says drawing is something people do, not something people perform.
- Leave the drawings up. Tape the rainy-day gallery to a wall or the fridge while the rain lasts. Kids draw more when yesterday’s drawing is still being admired.
- End with hot chocolate. Real hot chocolate this time. You’ve earned it. They’ve earned it.
Still stuck for ideas after all ten? Our list of 25 fun things to draw when you’re bored has plenty more — rainy day or not.
Make it a rainy-day tradition
Ten activities, one downpour, zero screens required. Our favourite thing about this list is that it works every single time it rains — and kids start requesting it. “Can we do the mushroom one again?” is a sentence we hope you hear soon.
Want printable practice pages to go with these? Grab our free Starter Pack at drawcub.com — tracing sheets and drawing exercises that pair perfectly with every tutorial above. Stay dry, keep drawing!
10 Easy Anime & Chibi Drawing Tutorials for Kids (Step by Step)
If you’ve ever watched a kid pause their favourite cartoon, squint at the screen, and whisper “I wish I could draw that” — this one’s for you. Anime and chibi characters are probably the most requested style we hear about from kids. Big sparkly eyes, tiny noses, hair that defies gravity. And here’s the secret: they’re genuinely easier to draw than realistic faces. Big shapes, simple lines, tons of personality.
We’ve rounded up ten of our anime and chibi tutorials, ordered the way we’d actually teach them — start at the top, work down, and by the end your kid will have a whole little character of their own.
Start with the eyes (always start with the eyes)
1. How to Draw Anime Eyes
In anime, the eyes do about 90% of the talking. Happy, sad, shocked, mischievous — it all lives in those big ovals. That’s why we say: nail the eyes first, and every character you draw after will look ten times better. Our tutorial breaks it into friendly steps — the upper lash line, the shine circles (kids love the shine circles), and how tiny changes to the shape shift the whole mood. Honestly, this is the single highest-leverage lesson on this list.
2. How to Draw a Chibi Face
Chibi means “short” or “small” in Japanese, and the style is exactly that: a big round head, tiny body, and the cutest proportions on the planet. This tutorial is the one we’d hand a complete beginner first. Round head, simple features, done in a few cheerful steps. Once this clicks, your kid has the foundation for half the list below.
3. How to Draw an Anime Girl Face
Ready for a full face? This one builds on the eyes tutorial — same sparkly eyes, now with the classic anime face shape, little nose, and simple mouth. There’s a moment every kid has, about halfway through this drawing, where they realise “oh wait, this actually looks like anime.” It’s great. You’ll hear about it.
4. How to Draw an Anime Boy Face
Boys, dads, and anyone who’d rather draw heroes than heroines — here’s yours. Sharper jawline, different eye angle, a bit more attitude. A fun trick: draw the boy face and the girl face side by side and compare how just a few line choices change everything. Great for understanding how artists “cast” their characters.
Give your characters a body
5. How to Draw a Chibi Body
A chibi head floating on nothing is a tragedy — let’s fix that. The chibi body is basically a bean with arms: two heads tall, stubby limbs, enormous charm. This tutorial keeps proportions forgiving (there’s genuinely no way to get it “wrong” — that’s the joy of chibi), so it’s perfect for younger kids who find full-body drawings intimidating.
6. How to Draw a Chibi Bunny Girl
Okay, this is where it gets fun. Take your chibi skills, add bunny ears, a fluffy tail, and a costume — and suddenly your kid isn’t just drawing, they’re designing characters. We love this tutorial because it teaches the leap from “following steps” to “making choices”: pick the ear shape, pick the outfit colours, make her yours. (Our team’s favourite to colour, for the record.)
7. How to Draw a Chibi Cat Girl
Same idea, whiskered edition. Cat ears, a little tail, maybe some stripes if you’re feeling fancy. If your household has a cat, expect this drawing to be immediately dedicated to them. Draw it twice: once following the tutorial, once as your actual pet. The second one always comes out weirder and better.
Finish with fabulous hair
Hair is where anime characters get their identity. Swap the hairstyle and you’ve got a whole new person — which makes these three the perfect ending to your practice session.
8. How to Draw Manga Girl Hair
Manga hair isn’t drawn strand by strand (thank goodness) — it’s drawn in big swooping clumps, and this tutorial shows exactly how those clumps sit on a head. Once kids get this, they start inventing their own styles on every character they draw. Pro tip from our team: let them go wild with the colours. Blue hair is canon. Pink hair is canon. It’s all canon.
9. How to Draw Long Hair
Flowing, dramatic, takes-up-half-the-page long hair. This one’s all about movement — the strands curve, overlap, and catch the light. It looks impressive on the fridge, which is honestly half the point of kids’ art. Pair it with the anime girl face above and watch your kid’s confidence double.
10. How to Draw Short Hair
And to round it out: the choppy, spiky, full-of-energy short styles. Short hair teaches something the long-hair tutorial doesn’t — how to suggest a lot with a little. Fewer lines, bolder shapes. It’s also the fastest way to make a character look like a completely different person, which makes it fantastic for “draw the same face with three hairstyles” experiments.
Tips for drawing anime with kids
- Trace the eyes first, then freestyle. Seriously — a few rounds of tracing anime eyes builds the muscle memory, and then drawing them freehand feels natural instead of scary.
- Use references from shows they love. Pause a cartoon, screenshot it, prop it next to the paper. Drawing “like the show” is the fastest motivation boost we know.
- Don’t skip the shine. Those white circles in anime eyes aren’t decoration — they’re what makes the eyes look alive. Kids who skip them always go back and add them. Every time.
- Keep a “character sheet” page. One page per character: front view, hairstyle experiments, favourite colours. Kids who do this start thinking like real character designers — and they keep drawing for months.
- Mistakes are just new characters. A lopsided chibi face isn’t ruined — it’s a new character with a quirky expression. This mindset is everything in art, and anime’s forgiving style is the perfect place to learn it.
Want to go deeper on faces in general? Our guide on how to draw faces for beginners walks through the learning order we’d recommend — from chibi faces all the way to realistic profiles.
Keep drawing!
That’s ten tutorials, one full character-design toolkit. Start with the eyes, end with the hair, and somewhere in the middle your kid will stop following steps and start inventing. That’s the moment we live for.
And if you’d like a printable head start, grab our free Starter Pack at drawcub.com — tracing sheets and practice pages that pair perfectly with these tutorials. Happy drawing!
12 Easy Fall Drawing Ideas for Kids (Autumn Art Projects)
Fall might be the easiest season to draw well. Think about it: the whole season is round pumpkins, simple leaves, and warm colours that forgive everything. An autumn drawing can be a little messy and still look gorgeous, because fall itself is messy — leaves everywhere, everything orange. It’s the one season where “I smudged it” becomes “I made it look natural.”
So here are twelve fall drawing ideas from our tutorials, grouped into the season’s greatest hits: the classics, the cosy indoors stuff, the woodland friends, and the sky. Each one takes about five minutes, one red line at a time, the DrawCub way.
The Autumn Classics
1. How to Draw a Pumpkin
No fall drawing list survives without the pumpkin, and honestly it shouldn’t try. A pumpkin is one of the most satisfying things a beginner can draw: those curved ribs teach you a real shaping skill, and the finished result looks properly autumnal even in plain pencil. Ours has the curly little stem on top, which is the detail that sells it. Colour it orange, obviously — but leave one rib white for a highlight. That’s the difference between a flat pumpkin and a round one, and it takes two seconds.
2. How to Draw a Leaf
A leaf is fall’s simplest subject and secretly one of its best lessons: the centre vein, the little side veins, the point at the tip. Our tutorial keeps it to a few steps, and the real fun starts after the drawing — colour it red, orange, yellow, or all three at once.
3. How to Draw a Sunflower
Sunflowers are fall’s last hurrah before winter, and they’re a fantastic confidence-builder. The trick is the centre: one big circle, and then the petals are just the same shape repeated all the way around. Repeatable shapes are a beginner’s best friend — by petal number six your hand knows what it’s doing.
4. How to Draw a Tree
An autumn tree is a whole scene in one drawing, and it’s easier than it looks. The trunk is two lines, the branches are smaller lines, and the leaves are just blobs of colour — red, orange, yellow blobs. Seriously, blobs. This is the drawing where “messy” becomes a technique. Our tutorial builds the tree step by step, and then the colouring is where you get to go wild. Pile the colours on. Fall trees don’t do subtle.
Cosy Indoors
5. How to Draw Hot Chocolate
Some drawings you can almost smell, and this is one of them. A steaming mug of hot chocolate is peak cosy-season energy — the mug, the swirl of steam, maybe a marshmallow bobbing on top if you’re feeling fancy. Our tutorial’s steam curls are the part worth practising; wavy lines like these show up everywhere in drawing. Draw this one on a rainy afternoon with an actual mug next to you.
6. How to Draw a Candle
A candle is a study in simplicity: a rectangle, a flame, a glow. But that simplicity is the point — it’s one of the first drawings that teaches you about light. The flame is a teardrop with a lighter centre, and the glow around it (just a soft yellow halo) transforms a plain drawing into a cosy one. This is a lovely one to draw in the evening, with the room a little dim — and it makes a genuinely sweet handmade card. Grandparents love this drawing. Trust us.
7. How to Draw a Potted Plant
Bringing a bit of green indoors is very on-brand for fall — everything outside is turning, so the houseplants become the stars. Our potted plant tutorial is wonderfully forgiving: the pot is a simple shape, and the leaves can be as loose and leafy as you like. No two people’s plants come out the same, which is exactly how it should be. This one’s great for practising leaf shapes before you tackle the autumn leaf above. Same skill, different season.
Woodland Friends
8. How to Draw a Fox
If fall had a mascot, it would be the fox. That orange coat against the autumn leaves — nature knew what it was doing. Our fox tutorial captures the important bits: the pointed ears, the white-tipped tail, that clever little face. The tail is the star; it’s big and fluffy and incredibly fun to colour. We’d use two oranges — a light one and a dark one — and blend where they meet. It takes the drawing from nice to “wait, did YOU draw that?”
9. How to Draw a Deer
Deer drawings have a quiet, gentle quality that’s perfect for fall. Ours is the friendly cartoon kind — big ears, soft eyes, and antlers that are simpler than they look (branching lines, like a tiny tree on each side of the head). The antlers are a great follow-up if you’ve already drawn the tree above — same branching logic. This is the drawing we’d frame.
10. How to Draw a Kawaii Mushroom
Mushrooms pop up everywhere in fall, and the kawaii version is pure joy — a chubby little cap, a happy face, spots. It’s the cutest thing in this whole list and we will not be taking questions. This is also the fastest drawing here: three minutes, tops. Doodle a whole row of them across the bottom of a page, in different sizes, like a little mushroom family. Kids go absolutely feral for this one. In the best way.
Fall Skies
11. How to Draw a Rain Cloud
Fall weather is famously moody, so let’s draw the mood. A rain cloud is one of the most useful doodles a kid can learn — it shows up in weather charts, in stories, in the corner of every “it was a gloomy day” illustration. Our tutorial’s cloud is the friendly puffy kind, and the raindrops are simple slanted lines underneath. Add a tiny lightning bolt if you’re feeling dramatic — it pairs beautifully with the rainbow below. Storm, then sunshine. Very fall.
12. How to Draw a Rainbow
And here’s the payoff after the rain. Rainbows are fall’s happy ending, and they’re secretly a colouring lesson disguised as a drawing: the arcs have to be evenly spaced, and the colour order is the whole game (red, orange, yellow, green, blue, purple — say it with us). Our tutorial builds the arcs step by step so they come out smooth. Draw the rain cloud and the rainbow side by side. It’s a two-drawing weather story, and it looks fantastic on a fridge.
Tips for Drawing Fall Scenes
- Orange is your superpower. Burnt orange, pumpkin orange, sunset orange — stock up. Half of fall drawing is just having the right oranges.
- Layer your colours. Colour lightly first, then press harder for the dark areas. Leaves and pumpkins get their roundness from layered colour, not from outlines.
- Smudges are leaves. If a colour smudges outside the lines, turn it into a fallen leaf on the ground. Fall forgives everything. We said it at the top and we’ll say it again.
- Draw the season, not just the object. A pumpkin sitting on grass is a drawing; a pumpkin with leaves scattered around it and a tree behind it is a scene. Three objects make a picture.
- Keep a fall sketchbook page. One page, one week, one new fall drawing each day. By Sunday you’ve got a whole autumn gallery. Date them — future you will love that.
Your Turn
Start with the pumpkin — it’s fall, it’s the law — and give yourself five minutes. Then grab our free Starter Pack at drawcub.com for printable practice pages. And when the holidays roll around, our 8 easy Thanksgiving drawing tutorials are the perfect next step.
Twelve drawings, one gorgeous season. Go make some orange messes.
12 Cute Baby Animal Drawing Tutorials for Kids (Step by Step)
There’s a reason baby animal drawings are everywhere. Big eyes, round cheeks, tiny everything — they’re basically engineered to make you go “aww.” And here’s the good news: that round, simple cuteness is exactly what makes them perfect for beginners. Fewer sharp edges, fewer tricky proportions. You don’t need talent for these; you need a pencil and about five minutes.
We’ve rounded up twelve of our favourite baby animal tutorials, grouped from “couldn’t be easier” to “slightly more of a challenge.” Every one is free, and each walks you through it one red line at a time.
The Super-Easy Starters
1. How to Draw a Chick
If a kid can draw one thing today, make it this chick. It’s basically two circles — a round little body and an even rounder head — plus a beak and dot eyes, and suddenly you’ve got the cheepiest little creature on the page. Ours sits about three steps from “I can’t draw” to “look what I made.” This is the tutorial we recommend when a child sits down and says drawing is too hard. It’s not. This chick proves it.
2. How to Draw a Duck
Ducks have a secret: they forgive wobbly lines better than almost any animal. That plump body and big flat beak look charming even when the ovals aren’t quite oval — which makes this the ideal second drawing after the chick. Our tutorial keeps the steps short and the shapes simple, and the finished duck genuinely looks like it should be paddling somewhere. We’d add a wavy water line underneath. Instant scene.
3. How to Draw a Pig
A pig is a drawing made of circles pretending to be an animal, and we mean that as a compliment. Round snout, round head, curly tail — the curly tail is the best part, one little spiral and the whole drawing comes alive. Beginners love this one because there’s no nose bridge, no muzzle, nothing to overthink. Just pink, round, and happy. Colour it in with the brightest pink you’ve got. It earns it.
4. How to Draw a Frog
Okay, hear us out: frogs are funny. That wide grin, those bulging eyes — a frog drawing has personality before you’ve even finished it. The trick is the eyes on top of the head; get those two bumps right and the rest is basically a smile with legs. Our tutorial makes it a quick one, and kids tend to draw this frog again and again. It also looks great in green marker, obviously.
The Crowd Favourites
5. How to Draw a Bunny
Ask any group of kids which animal they want to draw and at least one will say bunny. Ours has the long ears, the fluffy cheek circles, and that sweet round face — it’s the drawing that ends up taped to fridges everywhere. The ears are the part people worry about, but they’re just two tall ovals with a smaller oval inside — thirty seconds, done well. We’d draw this one big; bunnies deserve the whole page.
6. How to Draw a Cat
Every beginner’s sketchbook needs a cat, and this kitten-style one is the friendliest version we could make. Round face, triangle ears, whisker dots — it’s the classic, and the classic works. The whiskers are the fun bit: three quick lines per cheek and the face suddenly looks alert and alive. Pro tip from our team: don’t press hard on the whiskers. Light, quick strokes look way better.
7. How to Draw a Dog
This one’s for the puppy people — and let’s be honest, that’s most of us. Our puppy tutorial leans into the floppy ears and the big round snout, which is what makes a cartoon dog read as “puppy” instead of “dog.” The spots are optional, which we love — the same tutorial can produce ten different puppies. Floppy ears and brown spots on one, pointy ears and none on the next. Same five minutes, totally different dogs.
8. How to Draw a Panda
The panda might be the most-drawn animal in our whole collection, and it’s not hard to see why — it’s half drawing, half colouring page. Black ears, black eye patches, black arms, white everything else. The shapes underneath are genuinely simple, so the wow factor comes almost free. This is the tutorial we show people who say “but I want to draw something impressive.” It takes five minutes and it looks like you meant it.
A Touch More Challenge
9. How to Draw a Penguin
Penguins cheat at cuteness — they’re already round, so half the work is done before you start. The part worth learning here is the belly: that big white oval is what makes a penguin a penguin, and getting it smooth teaches you a genuinely useful curve. Our tutorial adds little flipper wings and tiny feet, and suddenly this is the most huggable drawing on the page.
10. How to Draw a Koala
A koala is a circle with attitude. Those enormous fluffy ears are the whole show — they’re what separate “grey blob” from “oh, it’s a koala!” — and the tutorial gives them the attention they deserve. The big oval nose is the other signature; one confident shape in the middle of the face. Kids who’ve finished the easier animals here should try this next — it’s the first one that teaches a real “signature feature,” and that lesson carries into every animal after it.
11. How to Draw a Hedgehog
This is the spikiest drawing on the list, and the most fun to colour. The spines look complicated but they’re honestly just a row of short flicks along the back — the tutorial breaks them into a rhythm, and once you’re in the rhythm it’s weirdly relaxing. Almost like doodling. The little face peeking out from under the spines is the payoff: tiny eyes, tiny nose, maximum charm.
12. How to Draw an Owl
We saved the owl for last because it teaches the best beginner trick on this page: symmetry. An owl is basically two big eyes in a round head, and those eyes have to match. The tutorial walks you through it step by step, and nailing it gives you a genuine skill — balanced faces, balanced everything. Plus, owls are just cool. This one looks fantastic coloured in with autumn browns and oranges, or left in pencil for a sleepy midnight look.
Tips for Drawing Baby Animals
- Start with the head. Almost every baby animal is head-first: draw the round head, then hang the body underneath. It works for nine out of ten animals on this list.
- Big eyes, small everything else. That’s the entire formula for cuteness. If your animal doesn’t look baby enough, make the eyes bigger. It works every time — we checked.
- Keep your lines light until the end. Sketch soft, then darken the lines you like — erasing a hard line leaves a ghost; erasing a light one leaves nothing.
- Don’t chase perfect circles. A slightly wobbly circle looks handmade and charming. A perfect circle looks traced. Kids’ drawings should look like kids drew them.
- Colour with intention. Two or three colours per drawing is plenty. A pink pig needs pink and maybe darker pink for the snout. Restraint looks professional.
- Draw the same animal twice. The second attempt is always better, and kids can see it happen in real time. That’s the moment drawing stops feeling scary.
Your Turn
Pick the chick — seriously, start there — and give yourself five minutes. Then grab our free Starter Pack at drawcub.com for printable practice pages to keep the streak going. And when you’ve worked through all twelve, our 20 easy animal drawings for beginners is the perfect next stop.
Twelve baby animals, twelve fridge-worthy drawings. That’s a pretty good afternoon.
How to Draw Faces for Beginners: A Friendly Guide
Let’s be honest for a second. Faces are the boss level of drawing.
You can draw a decent cat, a perfectly good flower, even a dragon that looks mildly threatening. But the moment you try a human face, something goes wrong. One eye floats somewhere near the ear. The nose looks like it was borrowed from someone else. And the smile — the smile always looks like it’s hiding something.
We’ve been there. Everyone has. Faces aren’t hard because you lack some mysterious talent. They’re hard because most people try to draw the whole face at once. That’s the mistake. Draw the parts instead, one at a time, and faces get surprisingly friendly.
So here’s our plan: eight tutorials, in a sensible order, that take you from “I’m scared of faces” to “wait, that actually looks like a person.” Each takes about five minutes, one red line at a time, the DrawCub way.
Start Where Faces Are Forgiving
1. How to Draw a Chibi Face
This is where we’d tell any beginner to start — us included. Chibi faces are the big-eyed, tiny-nosed cartoon style, and here’s why they’re perfect training wheels: the features are so simplified that nothing can go badly wrong. Two big eyes, a dot or a tiny line for a nose, a small mouth, done. You learn where everything sits on a face without the pressure of realism breathing down your neck. And they’re genuinely fun to draw — ours has a habit of looking cheerful no matter what you do.
The Real Thing (Sort Of)
2. How to Draw a Human Face
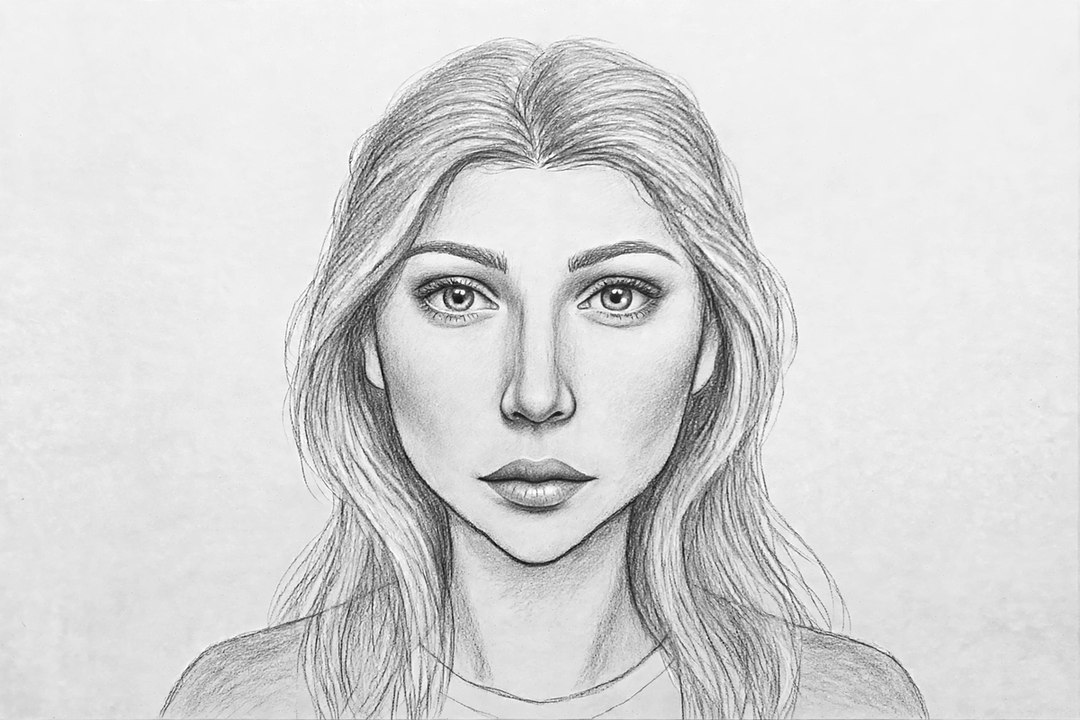
Okay. Deep breath. This is the one you were nervous about, and we get it — a proper front-facing human face. But here’s the thing nobody tells beginners: a front-facing face is mostly symmetry. Draw the oval, mark the lines, and then both halves mirror each other. Our tutorial walks you through the standard proportions (eyes at the halfway line — more on that later), and once you see the structure, the face stops feeling like guesswork. It won’t be portrait-perfect the first time. It doesn’t need to be. It needs to look like a person, and it will.
3. How to Draw a Face in Profile
Front views are one thing. Side views? That’s when faces get sneaky — the nose suddenly matters, the lips jut out, and the forehead-to-chin line has to be just right. But profiles are secretly easier than you’d think, because there’s only ONE eye to draw. Half the symmetry stress, gone. We’d honestly suggest a few profiles before committing to front views; they build confidence fast, and they make every sketchbook page look more advanced than it was to draw.
The Parts Department
Here’s our favorite trick for learning faces: stop drawing faces for a while and just draw parts. Fill a page with eyes. Then a page of noses. It’s like practising scales before playing a song — boring in theory, magic in practice. When you come back to a full face, your hand already knows what it’s doing.
4. How to Draw Anime Eyes
Eyes are the part everyone obsesses over, and honestly? Fair. Eyes are where the expression lives. Anime eyes are a brilliant starting point — expressive but simple: big shapes, shiny highlights, no fussy realism. Once you can draw a confident anime eye, regular eyes are just a calmer version of the same idea. This tutorial is one of the most-used on the site, and after two practice pages you’ll understand why.
5. How to Draw a Nose
The nose has an unfair reputation. People treat it like the hardest part of the face, but it’s really just… a few lines. Seriously — most cartoon and beginner-style noses are a curve, a dot, maybe an angle. This tutorial strips the nose down to its essentials, and we’d bet this is the page where you go “oh, that’s ALL it is?” It happened to most of our team.
6. How to Draw Lips
Lips trip people up for the opposite reason noses do: beginners draw them too heavily. A thick dark outline around the mouth makes every face look like it’s wearing stage makeup. The trick is soft lines and shading — and this tutorial shows you exactly how much (less than you think) and where (the corners and the middle shadow, mostly). Get this right and your faces jump from “cartoonish” to “hmm, actually pretty good.”
Put It All Together
7. How to Draw an Anime Girl Face
Now the payoff. You’ve got the chibi face down, you understand proportions, you’ve practised the parts separately — so this full anime girl face is where it all clicks. It’s a complete face, start to finish, with eyes, nose, mouth, and face shape in one tutorial. It’s also just a lovely drawing to have in your sketchbook. We’d colour this one in — big anime eyes look fantastic with a bit of marker or coloured pencil.
8. How to Draw Long Hair
No face is finished without hair, and long hair is where a lot of beginners freeze. Strands! So many strands! But here’s the secret from this tutorial: you don’t draw strands, you draw sections. Big flowing shapes first, a few strand lines on top for detail. That order makes all the difference — it’s the same reason you draw a face’s oval before its eyes. Draw the hair on top of any face from the tutorials above and suddenly you’ve got a complete character. That’s not a bad outcome for one drawing session.
Tips That Actually Help
- The eyes sit at the halfway line. Not near the top — at the middle of the head. Almost every beginner draws eyes too high. Fold your paper lightly in half horizontally once; that crease is where the eyes go. It feels wrong the first time. It’s right.
- Draw the parts separately first. A page of just eyes, a page of just noses. It feels like a step backwards but it’s the fastest way forward — your hand learns the shapes without the pressure of a whole face.
- Use the mirror trick. Finished a face? Hold it up to a mirror (or flip your phone camera). The reversed image shows every lopsided line instantly. Artists have done this for centuries.
- Don’t outline lips darkly. Soft lines, light shading — the tutorial above shows how. A heavy lip outline ages every face by about forty years. You’re welcome.
- Draw big at first. Faces drawn small are much harder — the lines have nowhere to go. Use the whole page. You can go small once the shapes feel natural.
- Trace to learn, then freehand. Tracing a face you like isn’t cheating; it’s how you teach your hand the curves. Trace three, then try one on your own. You’ll feel the difference.
Your Turn
Pick the chibi face — seriously, start there — grab a pencil, and give yourself five minutes. Then grab our free Starter Pack at drawcub.com for printable practice pages to keep the streak going. And when you’re ready to sharpen the whole skill set, our 7 beginner tips that actually work is the perfect next read.
Faces stop being scary the moment you stop drawing them all at once. One part, one line, one five-minute tutorial. That’s the whole method — and it works.
12 Easy Christmas Drawing Tutorials for Kids (Step by Step)
Christmas is about nine weeks away, which makes right now — yes, late October — exactly the right time to start drawing for it. Handmade Christmas cards drawn on a relaxed October afternoon look far better than ones panicked out on December 23rd. We’ve seen both.
So we gathered every Christmas tutorial on DrawCub into one list. Twelve drawings, each done in about five minutes, one red line at a time — the same beginner-friendly method as everything else on the site. Bonus: in December we’re running our 25 Days of Christmas Drawing series, so consider this your head start.
The Big Three (Start Here)
1. How to Draw a Christmas Tree
The centerpiece. Our tree is a stack of bouncy triangle layers with a star on top, and it’s the best first Christmas drawing a kid can make — big shapes, no fiddly details, impressive the moment the ornaments go on. Pro tip from our house: once the tree is drawn, hand it over for decorating. The crayon ornament budget has no upper limit.
2. How to Draw Santa
Round belly, white beard, red suit — Santa is basically a coloring page waiting to happen. Ours is cheerful rather than realistic, exactly right for little artists. The beard is the fun part: big fluffy curves that forgive every wobble in the pencil line. If a kid has ever said “I can’t draw people,” Santa is the answer. Nobody draws a bad Santa.
3. How to Draw a Reindeer
Our reindeer has the antlers front and center (draw them bigger than you think — bigger antlers, happier drawing), and kids always give it a red nose at the end. Rudolf or not, it’s the same drawing. That’s between us and the kids, and the kids always pick red.
The Characters
4. How to Draw a Gingerbread Man
Two eyes, a smile, some squiggly icing lines, and suddenly everyone wants a snack. The gingerbread man is nearly impossible to mess up — everything about it is round and friendly. Draw a whole cookie army for the fridge.
5. How to Draw an Elf
Every workshop needs staff. Our elf has the pointy hat, the pointy ears, and a grin that suggests it knows where the presents are hidden. A great second-day drawing — slightly more detail than the gingerbread man, but still all simple shapes. Kids who like drawing faces will be done before you can say “Christmas Eve.”
6. How to Draw a Christmas Angel
A gentle change of pace. The angel is all soft curves — flowing gown, round face, wings made of layered scallops. It’s the calmest drawing on this list, which makes it perfect for a quiet December evening when the house is already loud enough. Add a bit of gold crayon on the wings. Worth it.
Cozy Christmas Bits
7. How to Draw a Snowman
Top hat, carrot nose, scarf — the snowman is a three-circle miracle of simplicity. This is the one we’d hand to a total beginner, or to a four-year-old who wants to draw with the big kids. Two minutes in, they’ll have a proper snowman. The scarf is where the personality lives: stripes, spots, zigzags — never boring.
8. How to Draw a Snow Globe
A circle, a base, and a whole tiny world inside. The snow globe is the most imaginative drawing on this list — whatever you put inside (a tree, a snowman, a reindeer having a nap) becomes your own personal Christmas scene. The snow dots are just scattered dots. Easiest detail work in all of drawing.
9. How to Draw a Stocking
Hang it over the fireplace or admire it on its own. The stocking is a lovely curved shape with a fluffy cuff, and the stripes make it pop. Kids can fill the toe with little doodles of the presents they’d like. It’s also secretly one of the best shapes for practicing smooth curves without thinking about it.
10. How to Draw a Wreath
A circle of leaves, a bow on top, some berries — that’s a wreath, and it’s the prettiest drawing on this list once it’s colored. The leaves are just repeated little arcs, so this is secretly great pattern practice. Draw it big in deep green with red berry dots, and you’ve got a ten-minute door decoration.
Quick Wins
11. How to Draw a Santa Hat
Two shapes — a floppy triangle and a fluffy ball — and about three minutes. The Santa hat is the fastest drawing on this list, which makes it the perfect warm-up or finisher. Honestly, once a kid can draw the Santa hat, every other drawing becomes a Christmas drawing. Put it on the reindeer. Put it on the snowman. Nobody regrets the Santa hat.
12. How to Draw Christmas Lights
A swooping string of loops, little bulbs along it, and then — the best part — the coloring. Red, green, blue, gold, repeat. This drawing is basically a celebration of crayons. Draw one strand across the top of your page and everything underneath instantly looks more festive.
What to Actually Do With All These Drawings
Twelve drawings is a lovely pile of paper. Here’s what we’d do with them, tested over several Decembers:
- Handmade Christmas cards. Fold a card, glue on a drawing, write the message inside. The wreath and the snow globe make especially grand cards. Grandparents do not throw these away. Ever.
- Gift tags. Draw the quick wins (Santa hat, Christmas lights) small, cut them out, punch a hole, tie with string. Suddenly the presents look like they came from a much fancier household.
- Window scenes. Tape the bigger drawings to the windows facing the street. The snowman and Santa are neighborhood favorites. Your house becomes the one kids point at.
- A twelve-day countdown. Draw one tutorial a day. Tape them up in a row. By the time you finish, you’ll have your own little gallery — and you’ll be suspiciously ready for our 25 Days of Christmas Drawing series in December.
Tips That Actually Help
- Start with the snowman, not Santa. Three circles and a scarf. Two easy wins before anything ambitious — confidence compounds, especially in December.
- Coloring is half the art. Finish the pencil lines, then go bold: the deepest red, the brightest gold. Timid coloring is the only real mistake here.
- Let the lights be every color. Real Christmas lights come in sets. Drawn ones come in whatever colors are in the box. All of them. At once. This is correct.
- Draw together. One person draws the tree, another decorates it. Your snowman will look worse than your kid’s. It’s a law of the universe and it’s fine.
- Combine them into scenes. A snowman under the Christmas tree, the reindeer pulling nothing in particular but looking proud — these tutorials stack into full holiday scenes faster than you’d think.
Your Turn
Pick one — we’d say the tree, since everything else hangs off it — and give yourself five minutes. Then grab our free Starter Pack at drawcub.com for printable practice pages to keep the streak going. And if you want more Christmas ideas beyond these tutorials, our 25 easy Christmas drawing ideas for kids has you covered for the whole season.
Drawing for Preschoolers: A Parent’s Guide
Somewhere between the third birthday and kindergarten, most kids discover that a crayon is basically a magic wand. What comes out is wobbly and wonderful: a dog with eight legs, a house with a door on the roof, a self-portrait that is, technically, three circles and a wish.
And then, usually, one of two things happens. Either the kid keeps drawing with total confidence for years — or somebody (another kid, an older sibling, a well-meaning adult) laughs at the eight-legged dog, and the crayon goes quiet. This guide is about keeping the magic wand in the hand. If your child is between three and five, here’s everything we’d tell you if we could sit at your kitchen table.
First, the Supplies (Keep It Simple)
You don’t need much. In fact, too many supplies is a classic beginner-parent mistake — a 64-pack of crayons is a clutter explosion waiting to happen, not a starter kit.
- Chunky crayons or washable markers. Chubby crayons fit small hands and don’t require much pressure. Washable markers are the parent-sanity option. Pick one or the other for now.
- Plain paper, lots of it. Printer paper is fine. Sketchbooks feel special — kids treat them like treasure chests, which is exactly the attitude you want. Avoid tiny notebooks; preschool hands need room.
- That’s it. No pencil sharpeners, no 12-shade pencil sets, no erasers. Erasers teach kids that mistakes need undoing, and at this age, “mistakes” are where the fun lives.
One more supply worth mentioning: tape. You’ll want to tape today’s best drawing to the wall immediately. Fridge, hallway, bedroom door — anywhere it gets seen. A three-year-old who sees their art displayed will draw twice as much tomorrow. We didn’t make that statistic up, but we’d believe it.
The Right First Drawings
Preschoolers need drawings they can finish before their attention wanders — which means about three to five simple shapes, start to finish. We’ve watched a lot of little kids work through our tutorials, and these seven are the ones that reliably end in a finished drawing instead of a crumpled page:
1. How to Draw a Chick
Round body, round head, triangle beak. Three shapes, and the whole thing reads as “baby bird” to anyone with eyes. The chick is our number one recommendation for a first-ever drawing, because it’s genuinely hard to get wrong. A lopsided chick is still a chick — it’s just a chick with personality.
2. How to Draw a Sun
Every childhood sketchbook starts here: a circle with rays. But our version adds a little more character, and it’s the perfect lesson in one of drawing’s great truths — you can draw the same circle every single day and it will make you happy every single time. The sun also becomes the finishing touch on every future drawing.
3. How to Draw a Daisy
Circle center, petal loop-de-loops around it. The daisy is secretly a fine-motor-skills workout disguised as a flower — those petals ask little hands to do controlled curves, which is exactly the practice that helps with writing later. The kids don’t know that. They just think they drew a flower, and they beam.
4. How to Draw a Fish
Fish are the cheat code of preschool drawing. An oval, a triangle tail, one dot for an eye — done. The fish swims along in about two minutes flat, which means it’s perfect for the kid whose attention span is currently measured in seconds. Draw three fish and you’ve got an aquarium. Draw ten and you’ve got wallpaper.
5. How to Draw a Cookie
Circle, chocolate chips, done. The cookie might be the most relatable drawing in this entire list — every preschooler has strong feelings about cookies. Let them pick the chip placement. (We recommend not eating the drawing, though at this age, supervision may be required.)
6. How to Draw a Bunny
The bunny is the step up. Two long ears, a round face, whiskers — it’s maybe six shapes, and the ears teach a satisfying lesson about symmetry without anyone saying the word “symmetry.” Ears that don’t match just make the bunny look jaunty. Nobody has ever drawn a bad bunny.
7. How to Draw a Cat
Our graduation piece. The cat adds a tail, ears, and whiskers to everything the bunny taught, and when a preschooler finishes their first recognizable cat, something clicks. You’ve seen that look if you’ve seen it — the look of a kid who just realized they can draw anything. After the cat, they’re ready for whatever comes next.
How to Sit With Them (This Matters More Than the Tutorials)
Here’s the part most guides skip: your job isn’t to teach. It’s to be the audience. The co-artist. The person who gasps at the right moment. A few things we’ve learned from watching parents do this well:
- Draw your own, badly, on purpose. Sit next to them and follow the same tutorial. Your cat will look worse than theirs. This is the best possible outcome — it shows them that drawing is about trying, not being perfect. If you’re actually good at drawing, this is your one chance to sandbag. Enjoy it.
- Praise the specific thing. “Nice drawing” is fine, but “I love how you made the sun’s rays all different lengths” is a thousand times better. Specific praise teaches them what they did right, so they can do it again.
- Never “fix” their drawing. This is the big one. Don’t take the crayon and show them the “right” way to draw the ear. Their ear is the right ear. If they ask for help, help. If they don’t, admire.
- Ask questions, not corrections. “Tell me about your dog!” gets you a story. “That doesn’t look like a dog” gets you silence. At this age, every drawing has a story, and the story is half the point.
- Five minutes counts. You don’t need a thirty-minute art session. One tutorial, one drawing, five minutes — that’s a complete win. Daily five-minute streaks beat occasional hour-long marathons.
A Few Things to Skip
- Coloring books with tiny details. Those intricate mandala-style coloring pages are for older kids (and stressed adults). Preschoolers need big shapes and permission to scribble outside the lines. They will scribble outside the lines. That’s the curriculum.
- Comparison with siblings. “Your sister drew a better cat” is how you end a drawing habit. Compare each kid only to their own drawings from last month.
- Rushing to realism. Somewhere around four, kids start asking “does it look real?” The honest answer is: it doesn’t need to. The eight-legged dog is a better dog than a boring one.
Why This Is Worth Your Five Minutes a Day
Drawing does more for a preschooler than almost any other five-minute activity — it builds hand strength for writing, teaches them to plan and finish something, and gives them a way to think out loud on paper. If you want the full picture, our guide on the benefits of drawing for kids goes through what actually happens in their developing brains while they’re sketching circles. Spoiler: it’s a lot.
Your Turn (Yours, the Parent)
Tonight, tape two sheets of paper to the kitchen table, hand your kid the chunky crayons, and draw a chick alongside them. Five minutes. Then hang both drawings on the fridge — yours and theirs, side by side. And when you’re ready for tomorrow’s drawing, grab our free Starter Pack for printable practice pages made for little hands.
8 Easy Thanksgiving Drawing Tutorials for Kids (Step by Step)
Thanksgiving is five weeks away (November 26 this year, if you’re the planning type), and we have a prediction: at some point on the big day, you’ll need the kids to sit quietly for twenty minutes while you do something urgent. Rescue the gravy, find the good serving dish, or simply breathe.
This is where drawing comes in. A stack of paper, a box of crayons, and a Thanksgiving drawing tutorial is basically free childcare — the educational kind that grandparents photograph approvingly. So we pulled together every Thanksgiving tutorial on the site into one list. Eight drawings, each done in about five minutes, one red line at a time, the DrawCub way.
Our advice: start now, not the night before. Draw one a week and by Thanksgiving the kids will have a whole gallery ready — and the turkey-day drawings will be noticeably better than today’s. (Growth you can hang on the fridge. That’s our favorite kind.)
The Big One (Start Here)
1. How to Draw a Turkey
There’s no dodging this one. The turkey is the Thanksgiving drawing the way the birthday cake is the birthday party — non-negotiable. Ours is a cheerful six-step version: big oval body, fluffy tail lobes, triangle beak, and a wobbly wattle that makes the whole bird look like it’s telling jokes. This is the drawing most kids will beg to color first, because those tail feathers are basically a coloring-book page built into the bird.
The Dessert Section
2. How to Draw a Pumpkin Pie
Every Thanksgiving table has one, and every kid has an opinion about it. Our pumpkin pie tutorial skips the arguments about crust-to-filling ratios and goes straight to the good part: a golden triangle with a swirl of whipped cream on top. Honestly, drawing the pie takes about the same time as eating a slice — roughly five minutes, though the drawing is significantly less messy.
The Classics
3. How to Draw a Cornucopia
The horn of plenty. It sounds fancy, and on the finished page it looks fancy — all those apples and grapes tumbling out of a woven horn. But here’s the secret: it’s just a curved cone with fruit piled on top. Kids feel like they’ve drawn something from a museum when they’re done. Between us, the fruits are the fun part — each one is about three lines, and there’s no wrong way to draw an apple when it’s falling out of a cornucopia.
4. How to Draw a Pilgrim Hat
One tall black shape, a band, a buckle. That’s the whole tutorial, and we mean that as a compliment. The pilgrim hat is the confidence-builder of this list — the one to hand to the kid who just announced “I’m bad at drawing” (they’re not, they’ve just never had the right first step). Five minutes later they’ll have a proper historical hat on paper, and they’ll be ready for something trickier.
5. How to Draw a Scarecrow
Okay, this one earns its spot for the face alone. Our scarecrow has a stitched-up smile and a patched coat, and kids genuinely love drawing that grin — there’s something about drawing a happy face that puts one on the artist, too. The hat comes first (good practice after the pilgrim hat above), then the face, then the patches. It looks complicated. It isn’t. That’s the best kind of tutorial.
Quick Wins (Tiny and Satisfying)
6. How to Draw an Acorn
The smallest drawing on this list and, per kid focus-group research conducted in our own living rooms, one of the most popular. An acorn is just an oval in a cap — two shapes, maybe three minutes. It’s the perfect warm-up: draw three acorns in the corner of your page and suddenly you have a fall scene. We’d start every Thanksgiving drawing session with this one, the way runners stretch before a race.
7. How to Draw Corn on the Cob
If the acorn is the warm-up, corn on the cob is the victory lap for straight-ish lines. The husk gives you those big confident curves, and the kernel rows are just rows of little arcs — repetitive in the relaxing way, not the boring way. Kids who love patterns (and most of them do) will draw corn all day. Yellow crayons will be involved. There is no avoiding the yellow crayons.
The Grand Finale
8. How to Draw a Thanksgiving Feast
We saved this for last because it pulls the whole theme together: a table loaded with a turkey, sides, and all the trimmings. It’s the most ambitious drawing on the list — but it’s still the same one-red-line-at-a-time method, so it never feels hard. Draw this one the weekend before Thanksgiving and you’ve got instant wall art for the holiday. Prop it next to the real table on the day and take a photo. Trust us, the relatives will lose their minds over it.
What to Actually Do With All These Drawings
- Homemade place cards. Fold an index card in half, glue on a mini drawing of an acorn or corn, write each guest’s name. Ten minutes of drawing time, guests keep them forever. (Our families genuinely fight over these.)
- The gravy-rescue activity. When dinner prep hits crisis mode, hand the kids the feast tutorial and disappear. You get quiet time; they get a masterpiece. Everyone wins, especially the gravy.
- A gratitude banner. Draw the tutorials, cut them out, and string them across a banner with one thing each person is thankful for written underneath. This is the one the teachers in our circle swear by for classrooms.
- The fridge gallery. Turkey front and center, pie to the left, cornucopia to the right. It stays up until Christmas decorations go in. These are the rules.
Tips That Actually Help
- Start with the acorn, not the feast. Two easy wins before anything ambitious. Confidence compounds — this is true for kids and grown-ups alike.
- Color after the drawing is done, not during. Finish the pencil lines first, then break out the crayons. Half-colored outlines are how regrets are made.
- Let the turkey feathers be weird colors. Real turkeys are brown. Drawn turkeys can be purple, and purple is correct. Creativity outranks accuracy at Thanksgiving.
- Draw together. Sit down and do the tutorial alongside your kid. Your turkey will look worse than theirs. This is normal, and they will remind you of it. That’s the point.
- Combine them into scenes. An acorn at the foot of a cornucopia, a scarecrow guarding the pumpkin pie — these tutorials stack into a full Thanksgiving scene faster than you’d think.
Your Turn
Pick one — we say the turkey, since there’s no Thanksgiving without it — grab a pencil, and give yourself five minutes. Then grab our free Starter Pack at drawcub.com for printable practice pages to keep the streak going. And since the holidays only accelerate from here, our 25 easy Christmas drawing ideas for kids is waiting for when the last slice of pie is gone.
12 Easy Flower & Nature Drawing Tutorials for Kids & Beginners (Step by Step)
Here’s the thing about nature drawings: they’re the best-kept secret for beginners. Flowers and trees don’t judge you. A petal drawn slightly crooked? That’s character. A tree that’s a bit lopsided? Real trees lean, too.
That’s why this list is our most recommended starting point for anyone who’s never picked up a pencil before. Every tutorial below follows the DrawCub way — one red line at a time, five minutes per drawing, and a finished picture you can actually color in when you’re done.
The Flowers (Start Here)
1. How to Draw a Daisy
The official beginner flower of the universe. A circle, eight long petals, one stem — done. This is the tutorial we’d hand to a six-year-old on their very first try, because nobody has ever failed at a daisy.
2. How to Draw a Rose
Okay, roses have a reputation. We blame florists for making them look dramatic. But ours? Five steps, and the trick is a swirl in the middle that does all the heavy lifting for you. Grandmothers love receiving drawn roses, by the way. Take note.
3. How to Draw a Tulip
The friendliest of the spring flowers, in our opinion. Two big arcs, a couple of leaves, and you’ve got something that looks like it came straight out of a Holland postcard. Tulips are also a great warm-up before the trickier flowers.
4. How to Draw a Sunflower
Here’s the one that teaches an actual art concept without feeling like school: big shapes first, details later. The sunflower’s huge center circle is perfect practice for keeping your hand steady, and the payoff is enormous — kids hold up the finished sunflower like they painted the Sistine Chapel. We get it. It’s that pretty.
5. How to Draw a Cherry Blossom
Spring in five minutes. Cherry blossoms are just five petals, a dot cluster in the middle, and a branch — and suddenly your page looks like a Japanese spring festival. Draw three of them on one branch and nobody will believe you’re a beginner.
6. How to Draw a Lotus
The lotus looks advanced. It really does. Those layered petals have a way of impressing anyone who peeks at your sketchbook. Between us? It’s just a few curved lines stacked like a fan, and the guide walks you through each layer. Our pick for anyone who wants maximum wow for minimum effort.
Plants & Green Things
7. How to Draw a Cactus
The cactus is the undisputed champion of our “easiest cute drawings” rankings. It’s basically a rounded shape with arms — plus tiny spikes that are secretly the most fun part to draw. Color it green, give it a face (we won’t tell), and it’s instant fridge art.
8. How to Draw a Potted Plant
Real plants need watering. Drawn ones don’t, and we think that’s a genuine advantage. The potted plant tutorial is sneaky-good practice: the pot teaches you straight lines, the plant teaches you curves, and the whole thing looks like you decorated your own room. Plant-killers, this one’s for you.
9. How to Draw a Leaf
Don’t skip the humble leaf. One vein down the middle, two sides, done — except it’s also the foundation of every tree, flower stem, and plant you’ll ever draw. Learn the leaf now and everything on this list gets easier. Think of it as the alphabet of nature drawing.
10. How to Draw a Tree
Every child draws a tree at some point — usually a brown stick with a green blob on top, and honestly, that blob deserves respect. Our tutorial keeps the easy five-step spirit but adds real structure: a sturdy trunk, layered branches, and a canopy that actually looks leafy. The blob era is over. Long live the tree.
Sky & Weather (The Bonus Round)
11. How to Draw a Rainbow
The only drawing on this list where you’re basically required to use every color in your box. Seven arcs, six-ish colors (we’ve never met anyone who agonizes over the difference between indigo and violet, and we don’t expect you to start now), and the instant joy of coloring time. Rainbows are also the perfect ending to any drawing session — you literally finish on a high note.
12. How to Draw the Sun
We saved the sun for last because it’s the drawing that started every childhood sketchbook: the smiling circle in the corner of every drawing ever made. Ours is a little more refined, but the spirit is the same. Draw it in the corner of your flower drawings and it ties the whole page together.
Tips That Actually Help
- Start with the daisy, not the lotus. Confidence compounds. Two easy wins, then tackle the pretty stuff.
- One color layer first, details later. Shade the petals lightly, then go back and deepen. Rushing the darks first is how muddy colors happen.
- Keep your flower sketches loose. A wobbly line looks more like a petal than a ruler-straight one. Real petals curve — let your hand do what it wants.
- Combine them. A tree plus a sun plus a rainbow is basically a landscape. A daisy in a potted plant is a gift for mom. These tutorials stack into scenes faster than you’d think.
- Color before you trace. If you color first with a light touch and ink the outlines after, your lines stay crisp. Trust the process.
Want to understand why all this doodling is genuinely good for kids (and grown-ups)? Our guide on the benefits of drawing for kids covers what actually happens in the brain while you’re sketching petals.
Your Turn
Pick one — we say the daisy — grab a pencil, and give yourself five minutes. That’s the whole commitment. Then grab our free Starter Pack at drawcub.com for printable practice pages, and come back tomorrow for the next tutorial. Your sketchbook is about to get a lot greener.
12 Easy Halloween Drawing Tutorials for Kids & Beginners (Step by Step)
Halloween is two weeks away, and if your house is anything like ours, the excitement has already started. Costumes are being planned, candy is being negotiated… and every fridge door in the neighborhood is about to become a Halloween art gallery.
So we put together our complete Halloween collection in one place: 12 step-by-step drawing tutorials that kids (and total beginners) can actually finish. No “draw the rest of the owl” nonsense — every tutorial breaks the picture down into small steps, and the new part of each step is drawn in red, so you always know exactly what to add next. Each one also comes with a free printable and a coloring page, because we know half the fun is coloring it in afterwards.
Start with the pumpkin. Trust us on this one.
The Shortlist (for the impatient)
- Pumpkin — Easy, 5 min, 7 steps
- Ghost — Easy, 4 min, 6 steps
- Spider — Easy, 4 min, 6 steps
- Candy Corn — Easy, 3 min, 5 steps
- Witch Hat — Easy, 5 min, 6 steps
- Bat — Easy, 5 min, 6 steps
- Owl — Easy, 5 min, 6 steps
- Cauldron — Easy, 5 min, 5 steps
- Mummy — Easy, 6 min, 6 steps
- Skeleton — Medium, 8 min, 7 steps
- Black Cat — Hard, 7 min, 8 steps
- Haunted House — Hard, 8 min, 8 steps
1. The Pumpkin (Jack-o’-Lantern)
Easy · 5 minutes · 7 steps
This is the one we’d start with. A round, slightly squished pumpkin, a curly little stem, and that classic zigzag grin. It looks impressive on a Halloween card, and honestly, it’s mostly circles and triangles — don’t tell the kids.
👉 How to Draw a Pumpkin — step-by-step tutorial
2. The Ghost
Easy · 4 minutes · 6 steps
Possibly the friendliest ghost ever drawn. Big oval eyes, rosy cheeks, a wavy bottom — more “aww” than “boo”. Younger kids love this one because there’s almost no way to get it wrong.
👉 How to Draw a Ghost — step-by-step tutorial
3. The Spider
Easy · 4 minutes · 6 steps
A round little spider with eight bendy legs. Counting the legs out loud while you draw them is half the fun (and yes, everyone loses count at least once).
👉 How to Draw a Spider — step-by-step tutorial
4. The Candy Corn
Easy · 3 minutes · 5 steps
Three minutes. That’s it. That’s the whole drawing. If you need a quick win for a kid who’s feeling unsure, this is your tutorial — and the coloring is the best part.
👉 How to Draw a Candy Corn — step-by-step tutorial
5. The Witch Hat
Easy · 5 minutes · 6 steps
Tall, floppy, with a proper buckle band. Draw one in purple, then another in green… a whole row of witch hats in different colors looks great as a border on a Halloween poster.
👉 How to Draw a Witch Hat — step-by-step tutorial
6. The Bat
Easy · 5 minutes · 6 steps
The wings look tricky, but they’re really just a few scalloped curves repeated on both sides. Draw him hanging upside down from a branch for instant extra credit.
👉 How to Draw a Bat — step-by-step tutorial
7. The Owl
Easy · 5 minutes · 6 steps
Big eyes, tiny beak, very wise expression. Our tip: color him deep purple with an orange belly and he’ll look like he flew straight out of a storybook.
👉 How to Draw an Owl — step-by-step tutorial
8. The Cauldron
Easy · 5 minutes · 5 steps
A bubbling pot of something suspiciously green. The bubbles are a great excuse to go wild with sparkles, stars, and swirls of “magic” rising out of the top.
👉 How to Draw a Cauldron — step-by-step tutorial
9. The Mummy
Easy · 6 minutes · 6 steps
Here’s a secret: the mummy is the most forgiving drawing on this whole list. The bandages are supposed to be uneven! Two peek-a-boo eyes, lots of crisscross lines, done.
👉 How to Draw a Mummy — step-by-step tutorial
10. The Skeleton
Medium · 8 minutes · 7 steps
Ready for a bit more of a challenge? This cheerful skeleton is a sneaky way to learn simple body proportions — head, ribs, arms, legs — while staying firmly on the cute side of spooky.
👉 How to Draw a Skeleton — step-by-step tutorial
11. The Black Cat
Hard · 7 minutes · 8 steps
A sleek cat sitting very still, tail curled around her feet, like she’s posing for a portrait. It’s the hardest animal on the list, and finishing it feels like a real achievement. Older kids, this one’s yours.
👉 How to Draw a Black Cat — step-by-step tutorial
12. The Haunted House
Hard · 8 minutes · 8 steps
We saved the best for last. Crooked roof, crooked windows, a door that leans, and a big full moon behind it all. This isn’t just a drawing, it’s a whole scene — clear the table, take your time, and enjoy it.
👉 How to Draw a Haunted House — step-by-step tutorial
What You’ll Need
Good news: nothing you don’t already have at home.
- A pencil (any pencil) and an eraser
- Plain paper — or print the free PDF from any tutorial and draw along on that
- Markers, crayons, or colored pencils
- A kid who says “I can’t draw” (optional, but highly recommended — they’re our favorite kind of student)
Short on time? Every tutorial also has a coloring page version. Print it, hand over the crayons, and you’ve got a quiet 15 minutes. You’re welcome.
3 Things to Do With Your Finished Drawings
Make Halloween cards. Fold a sheet of card in half, draw a pumpkin or ghost on the front, write something spooky-sweet inside. Grandparents melt for these.
Run a draw-along. Put DrawCub’s Step Player on the TV or classroom screen — it plays the tutorial by itself, step by step — and let everyone draw together. Works beautifully for parties and classrooms.
Build a gallery wall. Color everything, cut it out, and tape the whole spooky collection along one wall. By October 31st it’ll be the best-decorated wall in the house.
A Few Tips From Our Side of the Pencil
Start light. Really — sketch the first lines so softly you can barely see them. You can always press harder later, and light lines erase cleanly when a leg ends up in the wrong place (it happens to everyone).
Follow the red line. In every DrawCub tutorial, the newest step is shown in red. If you ever feel lost, just look for the red part — that’s the only bit you need to draw right now.
And don’t chase perfect. A wobbly pumpkin is still a pumpkin. Some of our favorite drawings ever have one eye bigger than the other. That’s called character.
One More Thing (It’s Free)
If your kids enjoyed these, grab the 10 Easy Drawings Starter Pack on our homepage — ten more step-by-step tutorials with printables, completely free.
Still hungry for ideas? Here’s our earlier list of 10 Easy Halloween Drawing Ideas for Kids.
Happy drawing — and happy Halloween! 🎃